


Usage and licensing: Please feel free to share this pattern with others by directing them back to this page. You may not copy and paste, re-post, or duplicate it in any way without my permission. It is (c) 2022 Ruth Brasch. If you would like to reproduce this resource in a class, book, or other resource, please contact me via the "contact" tab on this website.
This square was originally designed for the KnitterKnotter 2022 Tunisian Blanket CAL.
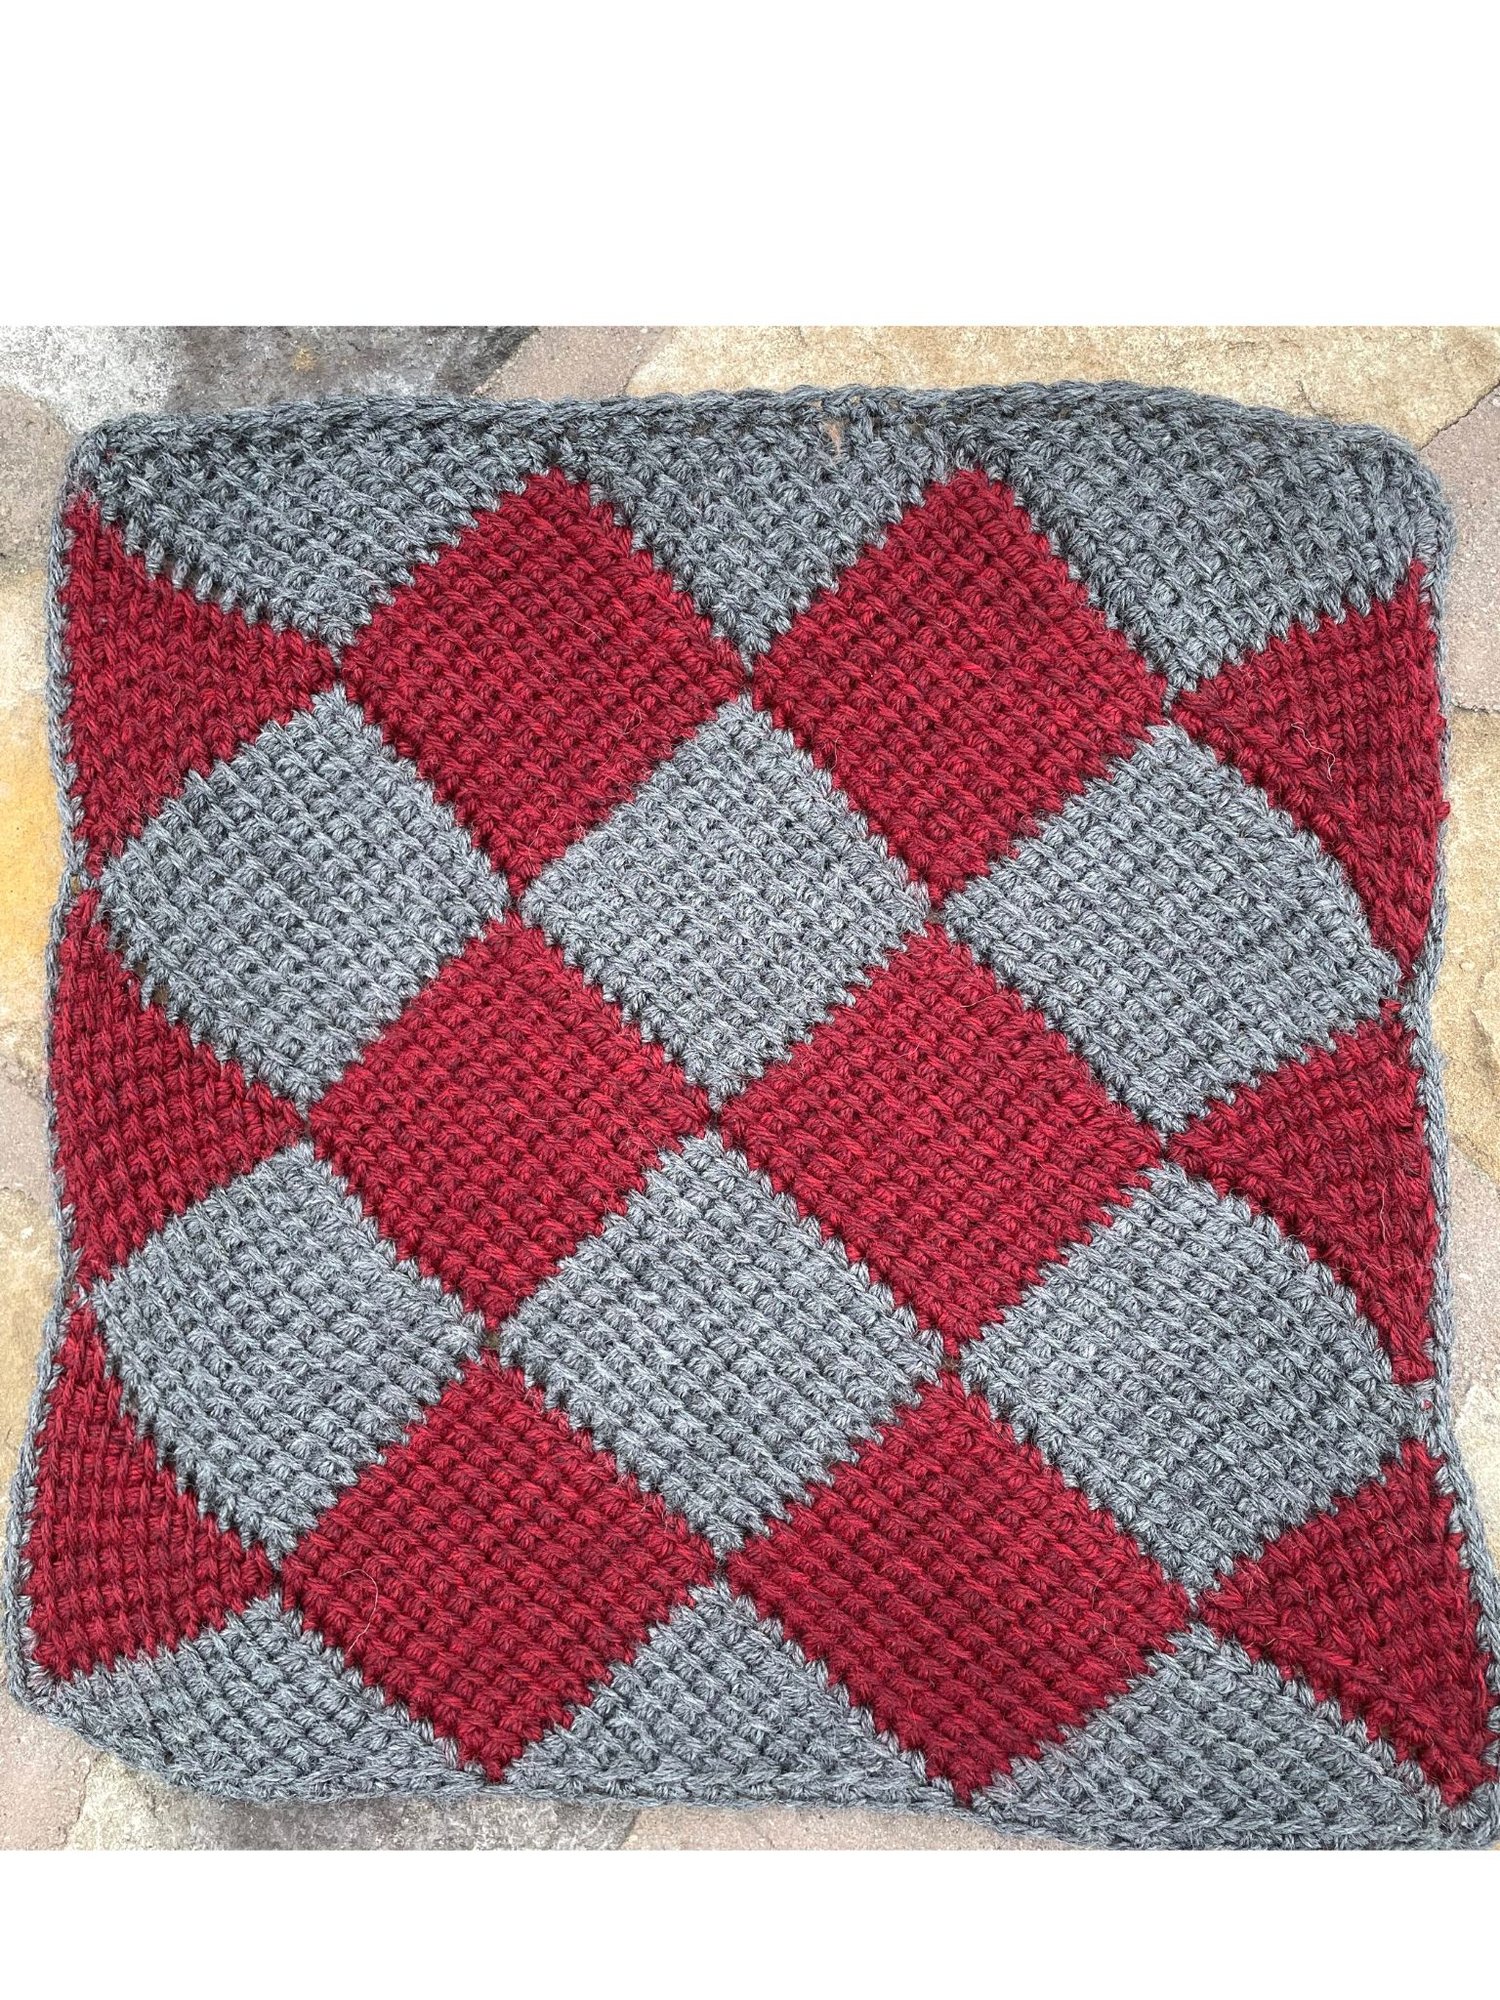
Please note that the sample shown on the Knitter Knotter blog shows significant modifcations to this pattern. It has a smaller center with an added on border. This pattern includes a basic single crochet border only, NOT the multi-row one shown on the CAL website.
This pattern has been thoroughly tech edited and tested prior to publication here.
Pleached trees are created by training trees to a square frame,
tying in and interlacing flexible young shoots along a supporting framework
(https://www.pracbrown.co.uk/semi-mature-trees/choose/pleached-espalier/)
This square is worked one color at a time, but the result is the appearance of an entwined square!
FINISHED MEASUREMENTS
12×12” square (30.5 cm square)
GAUGE
16 sts / 12 rows = 4” (10 cm)
in Tunisian Simple Stitch with smaller hook
MATERIALS
- Worsted weight yarn in two colors. The sample uses Knit Picks/We Crochet Swish Worsted in two colors. This yarn is 100% Superwash Merino, 270 yds (247 m) per 50 g ball. 75 yds (68 m) of Color 1 (Sample used Cobblestone Heather), 70 yds (64 m) of Color 2 (Sample used Garnet Heather)
- Crochet hook size K (6.5 mm)
- Crochet hook size 7.0 mm for starting chain, or size 0.5-1mm larger than gauge hook
NOTES
- Because the entrelac squares are not very wide, you can use a regular crochet hook to complete them. Please note that if you use an ergonomic hook with a grip very close to the head of the hook your stitches will be very bunched up. Choose a hook with space for 11 loops on it.
STITCHES & ABBREVIATIONS
Ch = chain: yo, pull through the loop on your hook.
DRetp = decrease return pass: (yo, pull through 2 lps) to end of row. Keep the final loop on the hook to begin the next forward pass.
Lp = loop
Pg = page
RetP = Return Pass. Yo, pull through one loop on hook, (yo, pull through two lps on hook) until one loop remains on hook. Keep the final loop on the hook to begin the next forward pass.
Sl St = Slip Stitch
St(s) = stitch(es)
TSS = Tunisian Simple Stitch. Insert hook from right to left under vertical bar, yo, pull up a loop.
TSS2tog = Tunisian Simple Stitch two together. Insert hook from right to left under next two vertical bars, yo, pull through 2 loops on hook.
PATTERN
BASE TRIANGLES
With largest hook and Color 1, chain 31 loosely
**Switch to smaller hook
Row 1: TSS in 2nd ch from hook (next chain on all future triangles). RetP.
Row 2: TSS, TSS in next chain (3 lps on hook). RetP.
Row 3: TSS in next 2 TSS, TSS in next chain (4 lps on hook). RetP.
Row 4: TSS in next 3 TSS, TSS in next chain (5 lps on hook). RetP.
Row 5: TSS in next 4 TSS, TSS in next chain (6 lps on hook). RetP.
Row 6: TSS in next 5 TSS, TSS in next chain (7 lps on hook). RetP.
Row 7: TSS in next 6 TSS, TSS in next chain (8 lps on hook). RetP.
Row 8: TSS in next 7 TSS, TSS in next chain (9 lps on hook). RetP.
Row 9: TSS in next 8 TSS, TSS in next chain (10 lps on hook). RetP.
Row 10: TSS in next 9 TSS, TSS in next chain (11 lps on hook). RetP.
Row 11: slip stitch in each of the TSS across (10 sl st, 1 lp remains on hook).
Repeat Rows 1-11 until you have used all the chains across. Three triangles have been formed. Cut Color 1, fasten off.
Proceed to Section 2
SECTION 2 (HAS EDGE TRIANGLES)
Work in this order: Right Edge Triangle, Full Square, Left Edge Triangle
Right Edge Triangle
Row 1: Place a slip knot with C2 on hook, TSS in 1st Sl St of right-most base triangle. RetP.
Row 2: TSS, TSS in next Sl St (3 lps on hook). RetP.
Row 3: TSS in next 2 TSS, TSS in next Sl St (4 lps on hook). RetP.
Row 4: TSS in next 3 TSS, TSS in next Sl St (5 lps on hook). RetP.
Row 5: TSS in next 4 TSS, TSS in next Sl St (6 lps on hook). RetP.
Row 6: TSS in next 5 TSS, TSS in next Sl St (7 lps on hook). RetP.
Row 7: TSS in next 6 TSS, TSS in next Sl St (8 lps on hook). RetP.
Row 8: TSS in next 7 TSS, TSS in next Sl St (9 lps on hook). RetP.
Row 9: TSS in next 8 TSS, TSS in next Sl St (10 lps on hook). RetP.
Row 10: TSS in next 9 TSS, TSS in next Sl St (11 lps on hook). RetP.
Row 11: slip stitch in each of the 10 TSS across
(10 sl st, 1 loop remains on hook).
Full Square
** This section uses the DRetp; make sure you’re not using the standard Retp.
Row 1: TSS in next 11 Sl St, DRetp.
Work Row 2 another 8 times.
10 total TSS rows worked.
Check your last row: the last sl st you worked into should be the top of a triangle/diamond peak.
Row 11: slip stitch in each of the TSS across
(10 sl st, 1 lp remains on hook).
Repeat Rows 1-11 of the Full Square once more
Left Edge Triangle
**The regular return pass is worked on this triangle, except for the last row.
Row 1: TSS in next 10 hdc, Retp.
Rows 2-9: TSS2tog, TSS to end of Row, Retp.
Row 10: TSS2tog, DRetp.
Cut yarn, fasten off.
SECTION 3 (NO EDGE TRIANGLES)
Full Square
** This section uses the DRetp.
Make sure you’re not using the standard Retp.
Place a slip knot with C1 on hook
Row 1: TSS in next 11 Sl St, DRetp.
Row 2: TSS 10, TSS in next Sl St, DRetp.
Work Row 2 another 8 times. 10 total TSS rows worked.
Check your last row: the Sl St you worked into should be the top of a diamond/triangle
Row 11: slip stitch in each of the TSS across (10 sl st, 1 loop remains on hook).
Repeat Full Square instructions twice more to complete Section 3. Cut yarn, fasten off.
Work Sections 2-3 again, then Section 2 once more before moving on to Top Edge Triangles
TOP EDGE TRIANGLES
** This section uses the DRetp.
Make sure you’re not using the standard Retp.
Place a slip knot with C1 on your hook.
Row 1: TSS in next 11 Sl St, DRetp.
Row 2: TSS2tog, TSS in next 8 TSS across, TSS in next Sl St. DRetp.
Row 3: TSS2tog, TSS in next 7 TSS across, TSS in next Sl St. DRetp.
Row 4: TSS2tog, TSS in next 6 TSS across, TSS in next Sl St. DRetp.
Row 5: TSS2tog, TSS in next 5 TSS across, TSS in next Sl St. DRetp.
Row 6: TSS2tog, TSS in next 4 TSS across, TSS in next Sl St. DRetp.
Row 7: TSS2tog, TSS in next 3 TSS across, TSS in next Sl St. DRetp.
Row 8: TSS2tog, TSS in next 2 TSS across, TSS in next Sl St. DRetp.
Row 9: TSS2tog, TSS in next 1 TSS across, TSS in next Sl St. DRetp.
Row 10: TSS2tog, TSS in next Sl St, yo, pull through all 3 lps on hook.
Repeat Top Edge Triangles until the whole top of the square is filled in.
BORDER
Turn the square 90 degrees clockwise, and begin working single crochet evenly down the edge, and working 3 sc in each corner. If you plan to work more rounds on the border, clip a locking stitch marker in the middle stitch of each of the three corner sc. If you do not plan to work more rounds, simply work until you reach your starting point and join with a slip stitch.
Cut yarn, weave in all ends, and block to size specifications.
TERMS OF USE
Finished items may be sold from my patterns if they are your handmade work.
My designs may not be used for mass production.
Standard copyright restrictions apply to the pattern itself. You may not sell, distribute, copy and paste the pattern itself to other websites, or otherwise reproduce my patterns or any of their charts, images, or written descriptions without written permission from the designer.
CONTACT
Designer can be contacted at: Ruth.Brasch@gmail.com
I’d love to see your projects! Please tag me on social media when you make them:
#RuthBraschDesign #PleachSquare @RuthBrasch
Chain Stitch & Forward Pass (FP) Photo Tutorial

Step 1: Grasp the tail of the yarn with your thumb and index finger. Wrap the long piece of yarn over your left index finger as if crocheting normally or knitting continental style.
Step 2: Wrap the yarn over the hook from back to front (this move will be called a “yarn over” from here on out), and catch it with the hook, and pull it through the loop that is already on your hook.
Step 3: This is what it should look like when Step 2 is done: a completed chain stitch.
Step 4: 4 chain stitches are complete. Each “V” is one chain stitch.
Step 5: Insert hook into 2nd chain stitch from hook (for the first stitch. The “next” chain for all the rest) – see photo at right for counting help.
Step 6: Yarn over, catch the yarn with the hook, pull it through the top loop on your hook (the chain stitch).
Step 7: When Steps 5-6 are worked correctly, it should look like this photo.
Step 8: When your TSS forward pass is complete, you’ll have multiple loops on your hook, like this photo.
Return Pass (RetP) Photo Tutorial

Please note that if you are working a DRetP, you will skip steps 1-2.
Step 1: Yarn over
Step 2: Pull yarn through 1 loop on hook
Steps 3-4: Yarn over, pull through 2 lps on hook
Step 5: This photo shows a completed return pass.
Tunisian Simple Stitch is worked into “vertical bars,”
These are marked in the photo on the right with white arrows. In this photo there are three vertical bars.
When working future TSS Forward Passes, you will insert your hook from right to left under this bar and pull up a loop.
Please notice that what looks like a 4th vertical bar all the way to the right is considered an edge stitch, and is never counted when I say “first vertical bar”.
Comments ()